Data view drawers
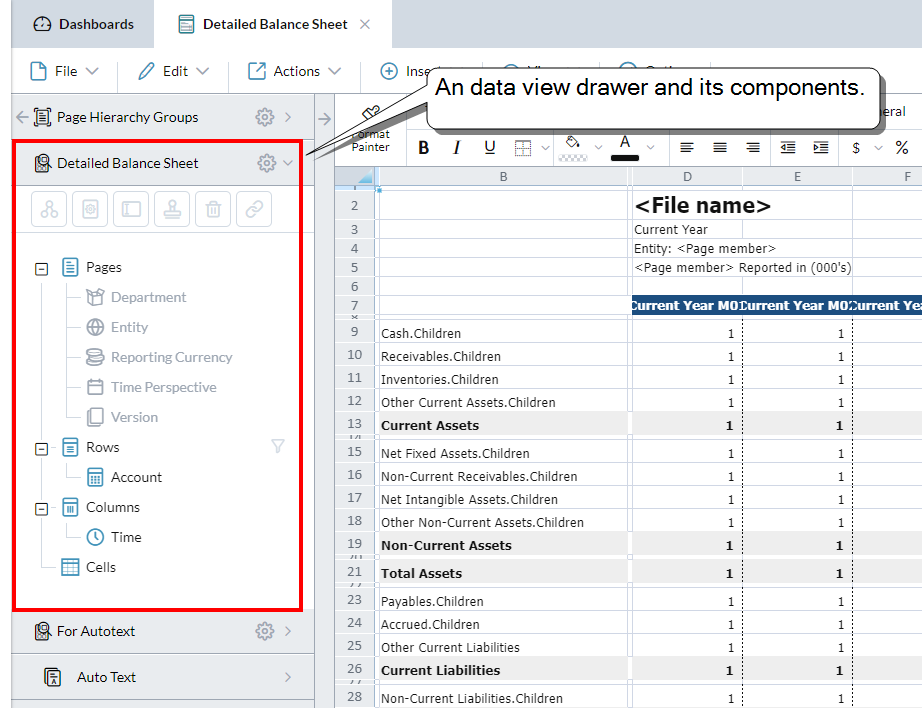
Each data view in a template has its own drawer. The drawers are stacked in the left-side panel of Template Studio and each is labeled with the name of the data view.
A drawer lists the components that make up the data view (the Pages, Rows, Columns, and Cells) as well as the page hierarchies that they contain.
You use the drawer to manage the data view, including to add Blanks and Row Notes.
Manage data views
View the available high-level functions
- Click to see the high-level functions that apply to the data view: Locate,Refresh Data From Model, Rename, and so on.
Move a data view
- In the grid, select the data view and drag it.
Page hierarchies
See the page hierarchies available in the data view
- Expand the Pages node.
See the page hierarchies currently used by the data view
- Expand the Rows and Columns nodes.
Find a page hierarchy in its data view grid
-
Click the Rows, Columns, or Cells node.
The cells that belong to it are highlighted in the grid.
Dimensions
Change the members of a dimension
-
In the hierarchy select the dimension and click .
The dimension opens in Member Selector.
Change how an axis dimension is displayed
- Under Rows or Columns, select the dimension.
-
In the lip click ,
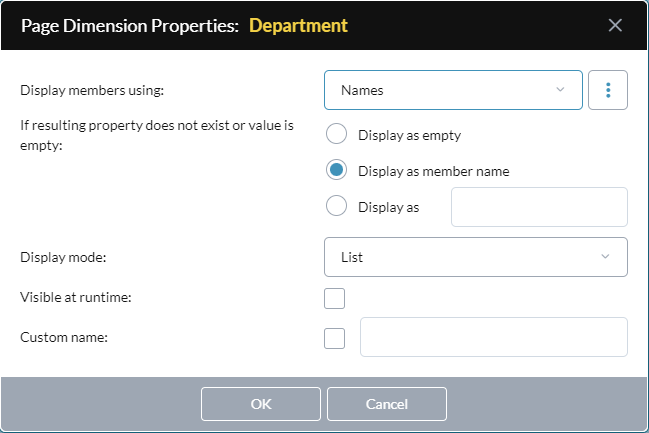
The Page Dimension Properties dialog opens.

- From Display member using select the member property you want to use.
-
Select an option to use in case the member property you chose in the previous step does not exist or its value is empty:
-
Display as empty: Show a blank space.
-
Display as member name: Show the member name instead of a blank space.
-
Display as: Type the text you want shown (maximum 20 characters).
-
- From Display mode, choose whether you want the members shown as a simple List or as a Hierarchy.
- If you want the format to show when the template is run, turn on Visible at runtime.
- If you want to provide a name, turn on Custom name and type the text in the box.
- To define a custom display format, click .
- Click OK.
Change how a row or column dimension is displayed
- Under Rows or Columns, select the dimension.
-
In the lip click ,
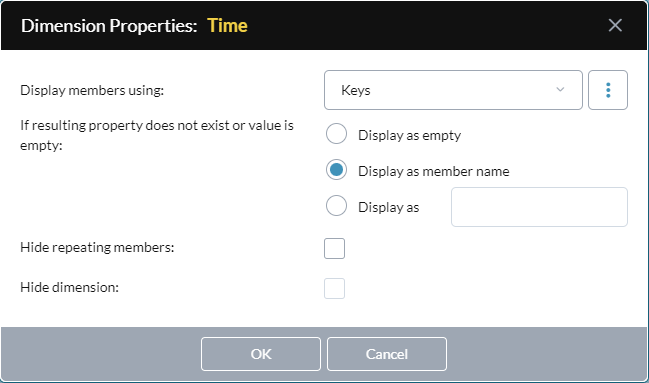
The Dimension Properties dialog opens.

- From Display member using select the member property you want to use.
-
Select an option to use in case the member property you chose in the previous step does not exist or its value is empty:
-
Display as empty: Show a blank space.
-
Display as member name: Show the member name instead of a blank space.
-
Display as: Type the text you want shown (maximum 20 characters).
-
-
In some cases you can enhance the presentation by turning on Hide repeating members and/or Hide dimensions.
For more information: see Why hide repeating dimension members? and Why hide a dimension? below.
- To define a custom display format, click .
- Click OK.
Why hide a dimension?
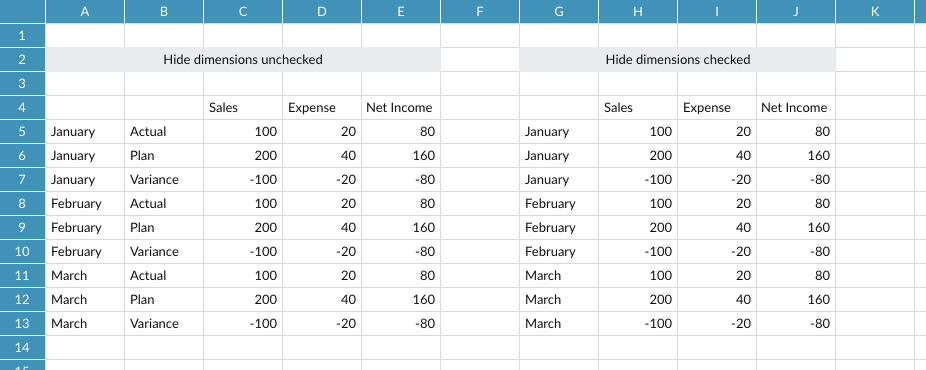
Hiding dimensions is useful where an axis has more than one dimension, but you only want to show the first dimension.
Example: A data view with Hide dimension turned off and with it turned on:
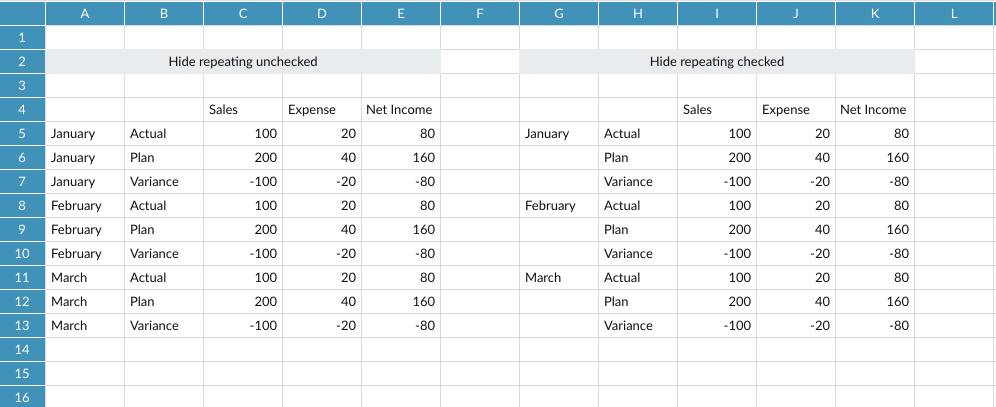
Why hide repeating dimension members?
When an axis has more than one dimension, you get repeating members. Hiding these repeating members makes the data easier to read.
Example: The first dimension in the vertical axis appears with Hide repeating members turned off and with it turned on:
Components
The term "component node" refers to the Rows, Columns, or Cells nodes in the data view drawer.
Move a component
-
In the data view drawer, select the component node.
In the data view grid the component appears outlined.
- Drag the component's outline to the new location.
Rename a component
-
Select a component node and click .
The new name can use letters, numbers, and symbols and can be up to 30 characters.
Clone a component
- Select a component node and click .
- Select a location for the cloned component, and click OK.
Cloning allows you to copy and re-use a component, with alterations if you want, within the data view.
Example: You could clone the row axis and then change the display format in the cloned version to show a different member property value, such as Names instead of Keys, or even hide one of the dimensions.
Note: The cloned version remains linked to the original data view: if you change the members in the original, your changes appear in the clone as well.
Delete a component
- Select a component node and click .
Link to a template
You can link a component to another template. When the template runs, the end user can click the link to open the linked template.
- Select a component node and click .
- Click and select the template.
- Click OK.