Auto Text
Auto Text is the Template Studio feature that a designer uses to add predefined elements to a template or a printed report to display dynamic information.
When an end user opens the template for data entry or as a report, the Auto Text elements can show, for example, the template name, the current date, or the currently selected page member.
In design mode the elements appear as tokens; for example, <File Name>, <Date>, or <Page member>.
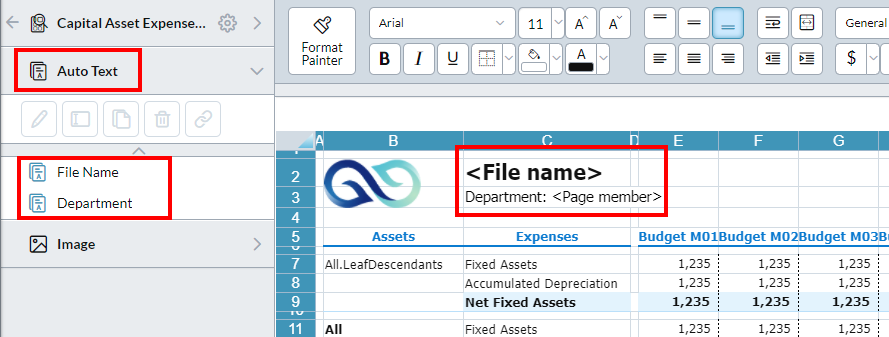
Example: The template below contains two Auto Text elements, listed in the Auto Text drawer, with their tokens in the template also visible:
The elements
The objects that you can add to a cell in the template grid are as follows:
- Text: Shows the text that you type in Content.
- Date: Shows the current date.
- File name: Shows the name of the template file.
- Page member: Shows the name (and/or key or custom format) of the currently selected member of a page dimension.
- Time: Shows the current time in the selected format option from Display.
- Total pages: In a report, shows the total number of pages.
- User: Shows the selected option from Display:
- User ID, First name, Last name, or Email of the user who runs the template.
- Current page: In a report, shows the number of the current page.
Add an element
Note: You cannot add an Auto Text to a cell that has been merged.
-
Select Insert > Auto Text.
The Auto Text dialog opens.
- Click .
- Select from Auto text type.
- Specify any other properties.
- Click OK.
- Select the cell where you want to put the element.
Add multiple
You can have more than one Auto Text inside the same cell.
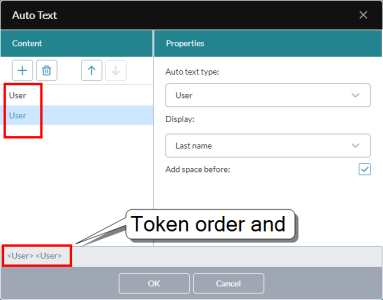
Example: You want the user's full name to appear in a report, so you add two User auto text elements to the cell, one set to display First name, the other set to display Last name.
The steps for the example above are as follows:
-
Select Insert > Auto Text.
The Auto Text dialog opens.
- Click .
- From Auto text type select User.
- From Display, select First name.
- Click .
- From Auto text type select User.
- From Display, select First name.
-
Turn on Add space before.
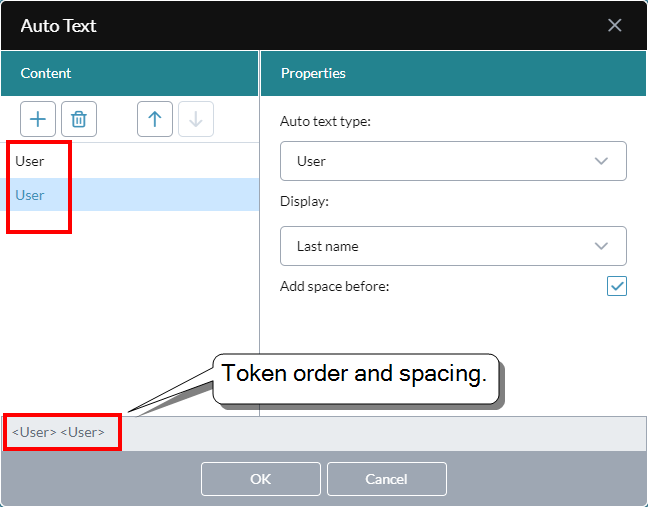
At this point the editor lists both elements, and, at bottom left, previews their layout in the cell.
- Click OK.
- Select the cell where you want to put the element.
Add a Page Member
The Page Member type is only available if the template contains a data view.
-
Select Insert > Auto Text.
The Auto Text dialog opens.
- Click .
-
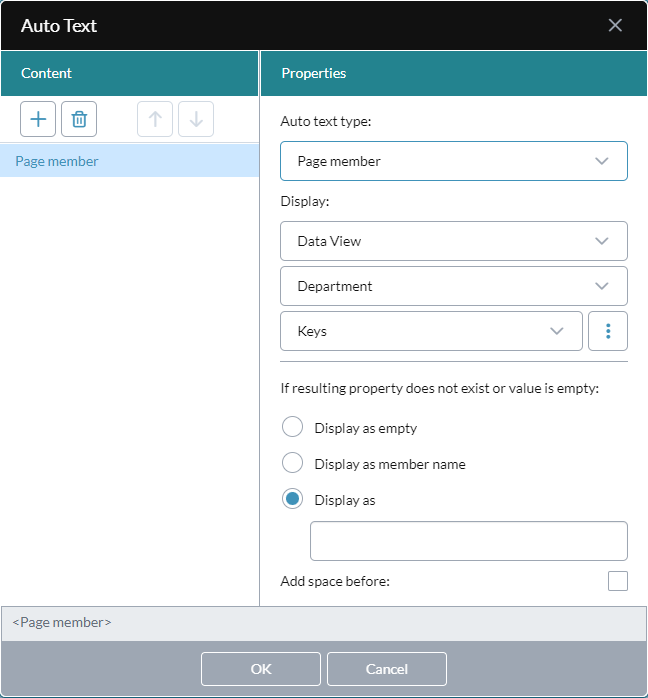
From Auto text type select Page member.
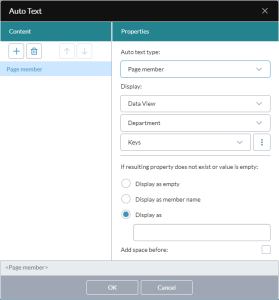
- Under Display:
- The first drop-down shows the name of the data view; if there is more than one data view in the template, select the data view that contains the page member you want to use.
- From the second drop-down, select the dimension.
- From the third drop-down, select the display format.
- To create a custom display option, including whether it is sourced from the parent level, click .
-
Select an option to use in case the member property you chose in the previous step does not exist or its value is empty:
-
Display as empty: Show a blank space.
-
Display as member name: Show the member name instead of a blank space.
-
Display as: Type the text you want shown (maximum 20 characters).
-
- If you are combining this Auto Text element with others, you may want to turn on Add space before.
- Click OK.
- Select the cell where you want to put the element.
Merged cells
Note the following:
- You cannot add an Auto Text element to a cell that has been merged.
- You cannot merge cells that already contain an Auto Text element.
To merge cells and add an Auto Text element
- Create the Auto Text as described above.
-
In the final step where you select the target cell, select the range of cells you want to merge, and click OK.
The selected cells automatically merge.
Manage elements
Note that when you open a new template the Auto Text drawer is not visible; the drawer only appears after you add the first Auto Text element to the template.
The Auto Text drawer lists all the Auto Text elements present in the template.
Use the drawer to find, edit, rename, delete elements, and so on.
Edit an element
Note: You can't directly edit an Auto Text element in the grid.
- Open the Auto Text drawer.
-
Select the element and click .
The Auto Text editor opens.
Tip: Double-clicking the element in the grid also opens the editor.
Clone an element
- Select the element in the Auto Text drawer.
- In the lip click .
- Select a cell in the grid.
- Click OK.
Tip: You can apply the various cell formatting options to Auto Text elements, as you would to any other cell.
Add a template link
You can link an Auto Text to another template. When the template runs, the end user can open the linked template.