Edit Layout
Admins use Edit Layout to define the screen layout when creating a data view—that is, how the dimensions are arranged as rows, columns, and pages, and the members that they show.
Edit Layout is available in Ad Hoc Analysis, Template Studio. and Analyzer.
You use the Choose Layout tab to arrange dimensions/hierarchies into the pages, columns, and rows of the data view.
You use the Choose Members tab to specify the members from each dimension that you want in the data view.
In order to develop the data view, you go back and forth between the two tabs, as needed.
The Choose Layout tab
You use the Choose Layout tab to arrange dimensions/hierarchies into pages, columns, and rows in the data view.
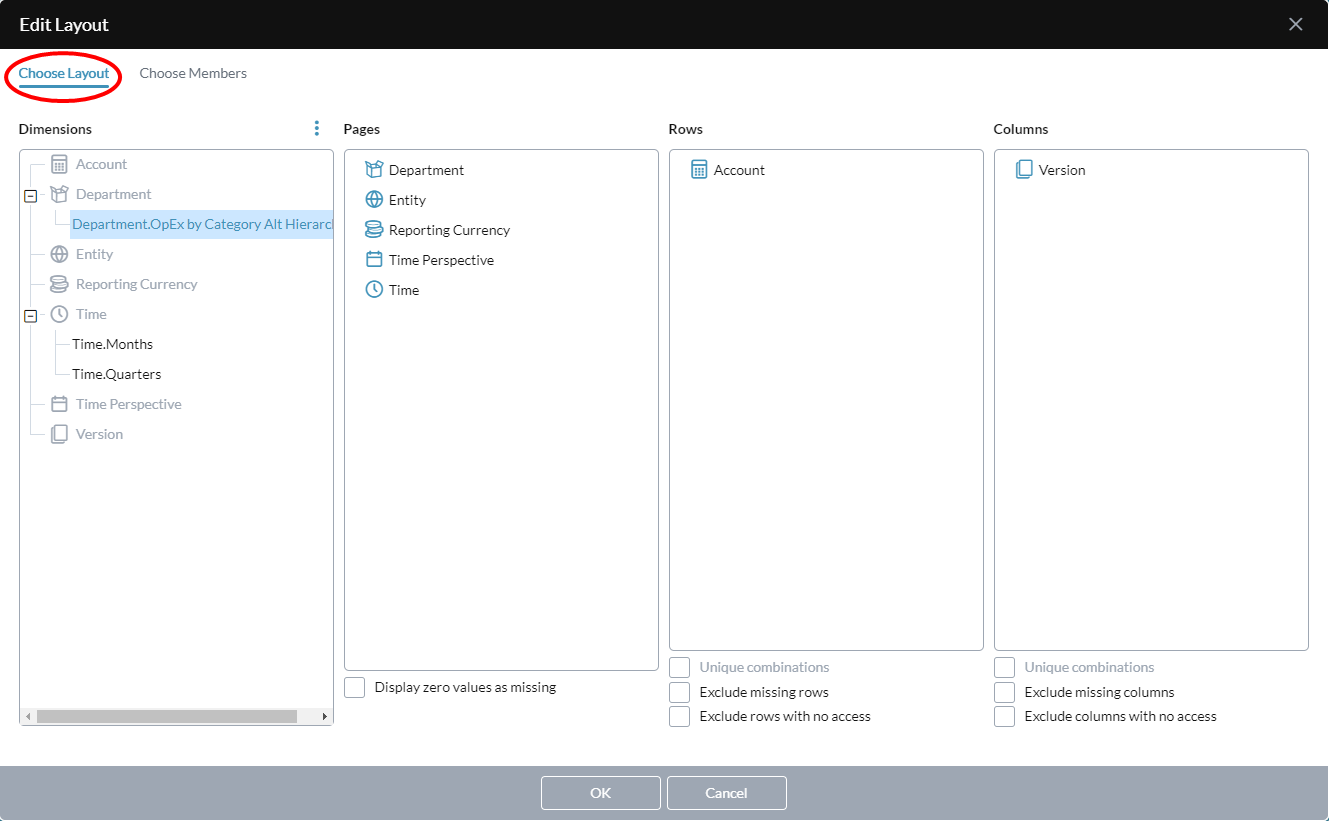
The tab contains four sections:
- Dimensions: Lists all the dimensions and alternate hierarchies that exist in the cube.
- Pages: The dimensions here become "pages" in the data view when it is run in Ad Hoc Analysis.
- Rows: The dimensions here provide the rows of the data view. (Note that the section can contain more than one dimension.)
- Columns: The dimensions here provide the columns of the data view. (Note that the section can contain more than one dimension.)
Change the layout
Defining a data view layout is simply a matter of moving elements around and turning a couple of settings on or off.
Move a dimension or member to another section
- Drag the dimension or member to the target section.
Change the order in the Pages, Rows, or Columns section
- Drag the dimension or member up or down in the list.
Hide rows or columns that contain zero values
- Turn on Display zero values as missing.
Hide columns or rows that are empty
- Turn on Exclude missing columns or Exclude missing rows.
Hide rows or columns for which the user has no permission
-
Turn on Exclude rows with no access or Exclude columns with no access.
Note:Turning on this option for a data view also hides No Access data from the user when the data view is used in the following:
- Dashboard charts
- Analyzer
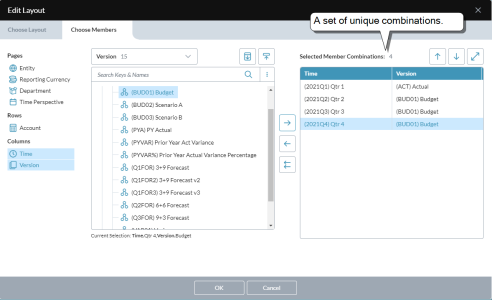
Add unique combinations
The term unique combination refers to having more than one dimension or alternate hierarchy in the row or column axis of a data view.
Example: You might use unique combinations when you have Time and Version on the columns and you want to show actuals for the first three months of the year and plan for the last nine months. If you didn’t use unique combinations, your data view would have to show 12 months of actuals and 12 months of plan data.
Initially, the Unique combinations options are unavailable:

To add unique combinations
-
Move two or more dimensions or alternate hierarchies to the Columns or Rows section:
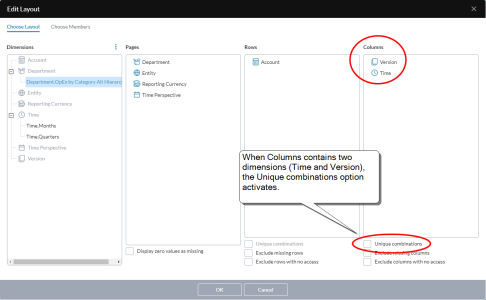
- Turn on Unique combinations for the section.

After adding a unique combination, you define the combination by selecting its members in the Choose Members tab.
The Choose Members tab
You use the Choose Members tab to specify the members from each that you want to use in the data view.
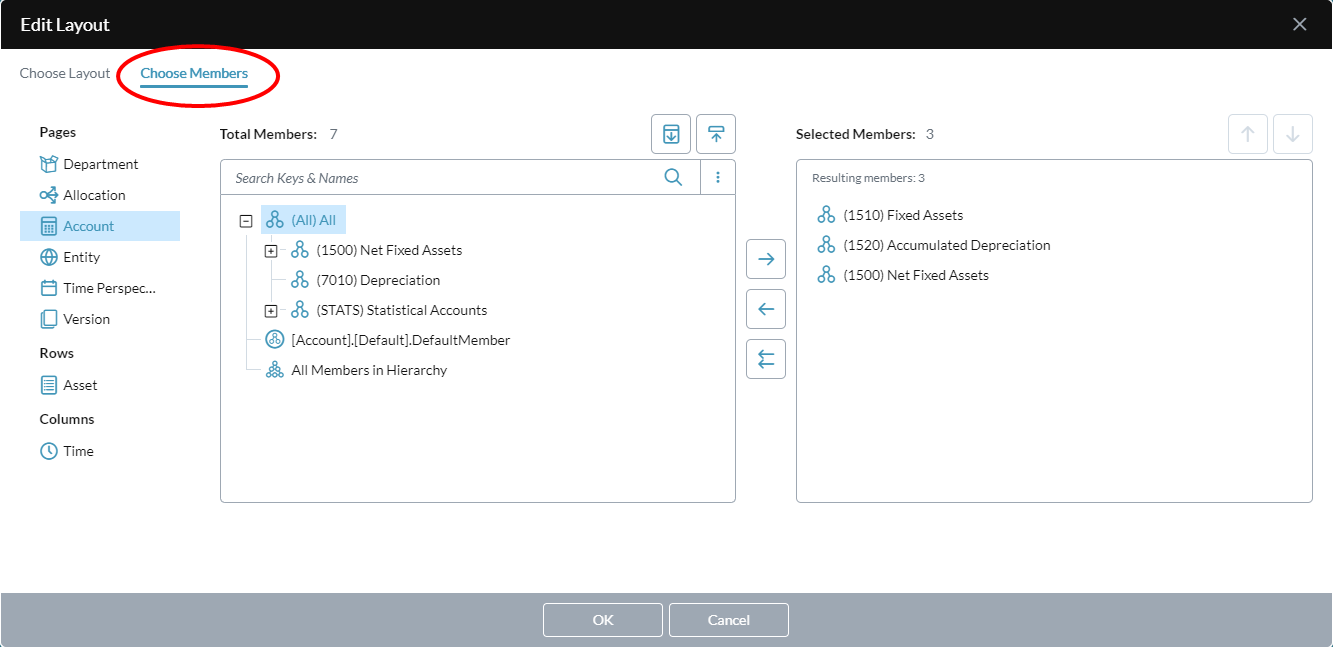
The Pages, Rows, and Columns sections show the arrangement of dimensions from the Choose Layout tab. To change them, go back to that tab.
The two larger sections are just like those in Selector: the center section shows the members of the dimension currently highlighted from the sections on the left; the right section shows the members selected to appear in the data view.
Make a member selection
- Select a dimension in the Pages, Rows, or Columns section.
-
All the functions for member selection (aside from unique combinations) are identical to those found in Member Selector.
You can select, remove, and sort the members.
Note: When creating a data view, calculated Time Perspective members (for example, YTD) are not supported when used in combination with a Time dimension alternate hierarchy. Time dimension alternate hierarchies will only properly aggregate data with the BASE Time Perspective member and will not work for any calculated Time Perspective member.
Define unique combinations
If you added a unique combination in the Choose Layout tab (see above), you can now define the unique combination.
-
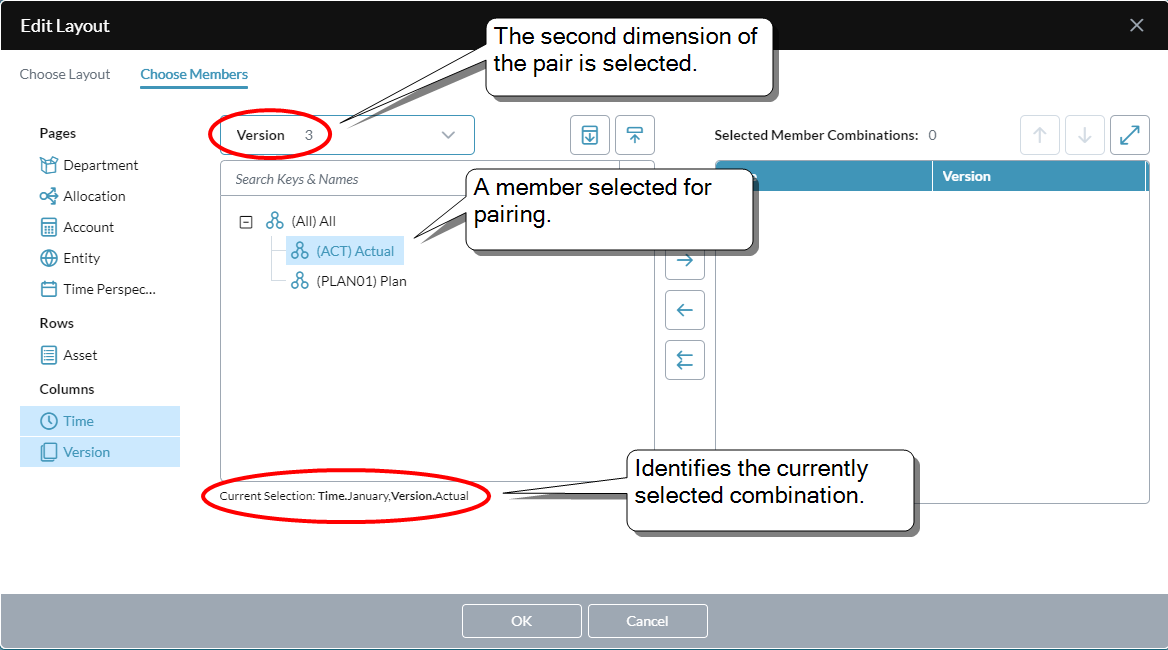
To choose the first member of a combination, select a member in the left-hand panel.
(The drop-down above the panel shows the name of the dimension and how many members it contains.)
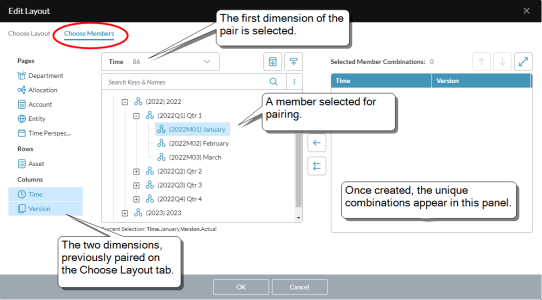
- To choose the second member of the combination:
- from the drop-down, select the second dimension
in the panel, highlight the member you want

Tip: The currently selected members for a combination are identified at the bottom of the left-hand panel.
-
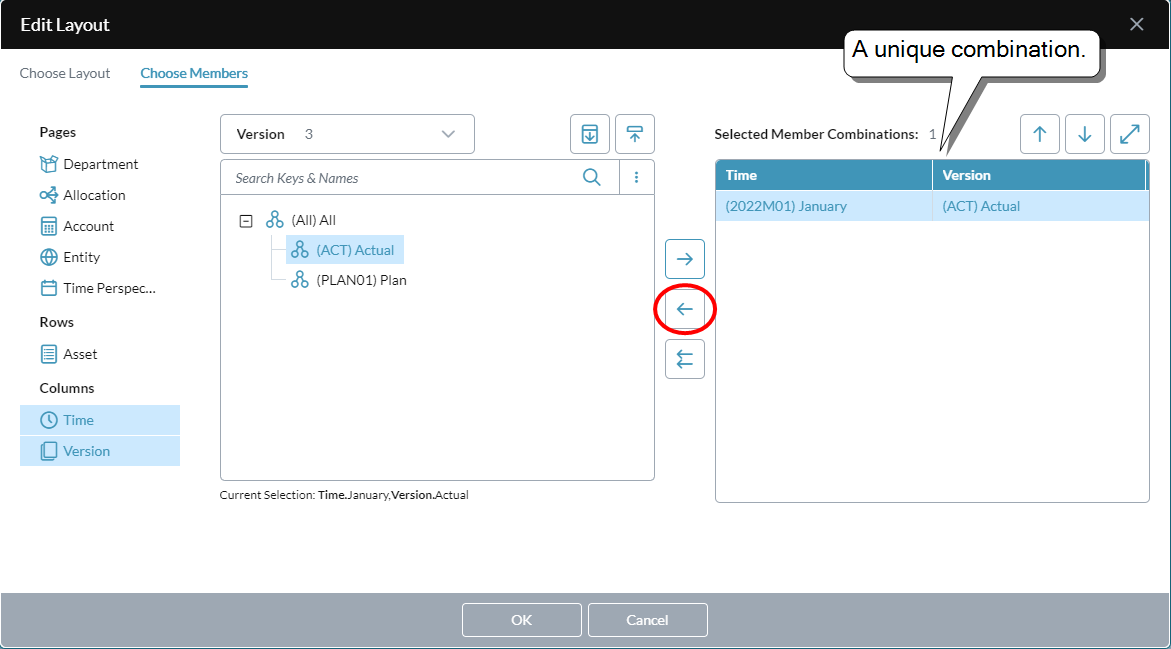
To create the unique combination, click :
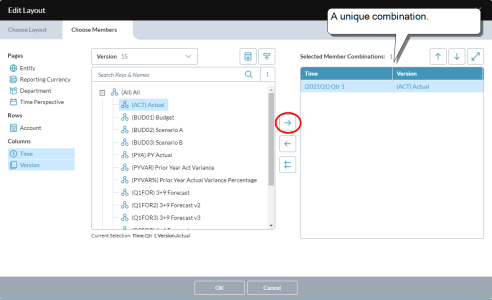
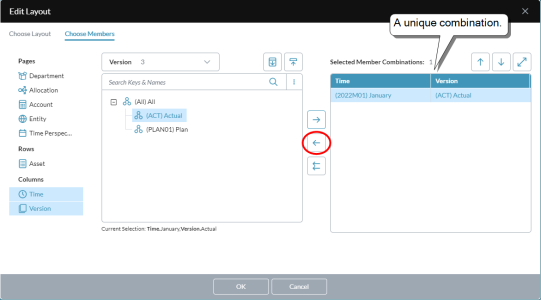
Both members of the combination are moved together and appear in the combinations panel.
-
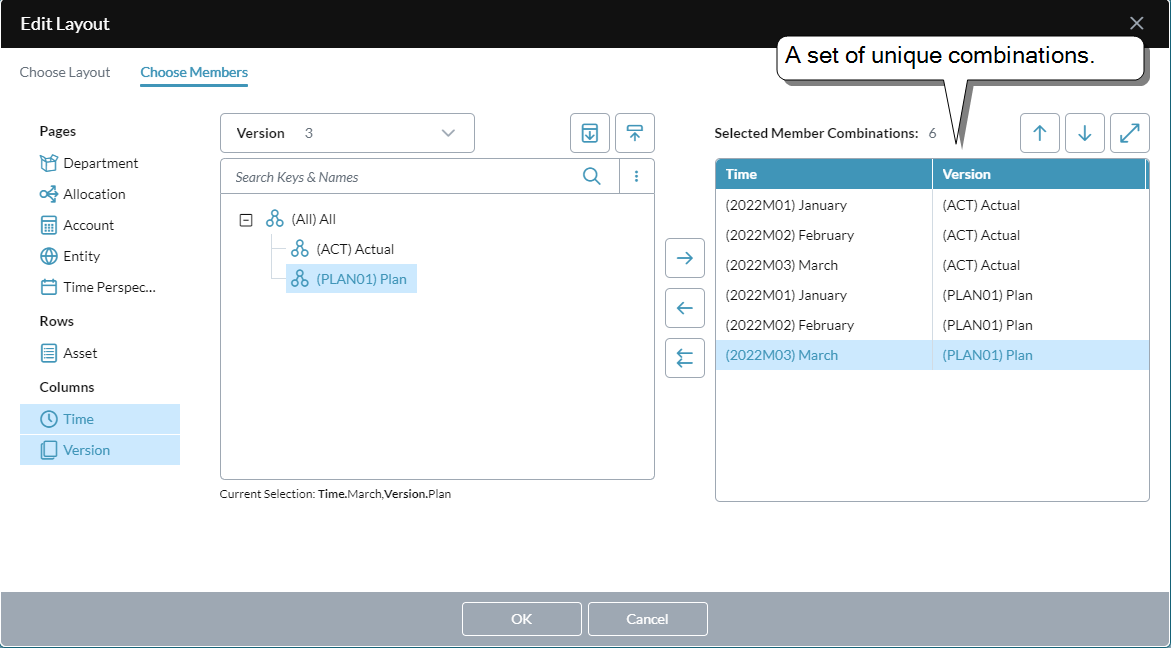
To add more unique combinations, repeat the above steps.

- Click OK.